Introducing AI-Fuelled Noise Removal Feature: Cancel Out Unwanted Sounds from Any Recording
Elevate your recording quality to make it sound even more crisp with Noise Removal.

Our commitment to creators has guided us since day one, so we're excited to announce that you can now remove background noise from your audio and videos recorded with Waveroom.
In partnership with our friends from LALAL.AI, an AI-powered stem splitter, we've made it possible to cancel out noise from a recording to make your podcast sound more crisp than ever.
Whether you’re recording a podcast or interview, solo or with guests, a noisy environment is no longer a big deal.
All you need to do is record audio or video in Waveroom as you normally would and remove the noise from the recording. How? Let's find out below!
How to use Noise Removal & how it works
First of all, start recording in Waveroom.
- Log in to your Waveroom account or create it if you don't have one.
- Click Create Room.
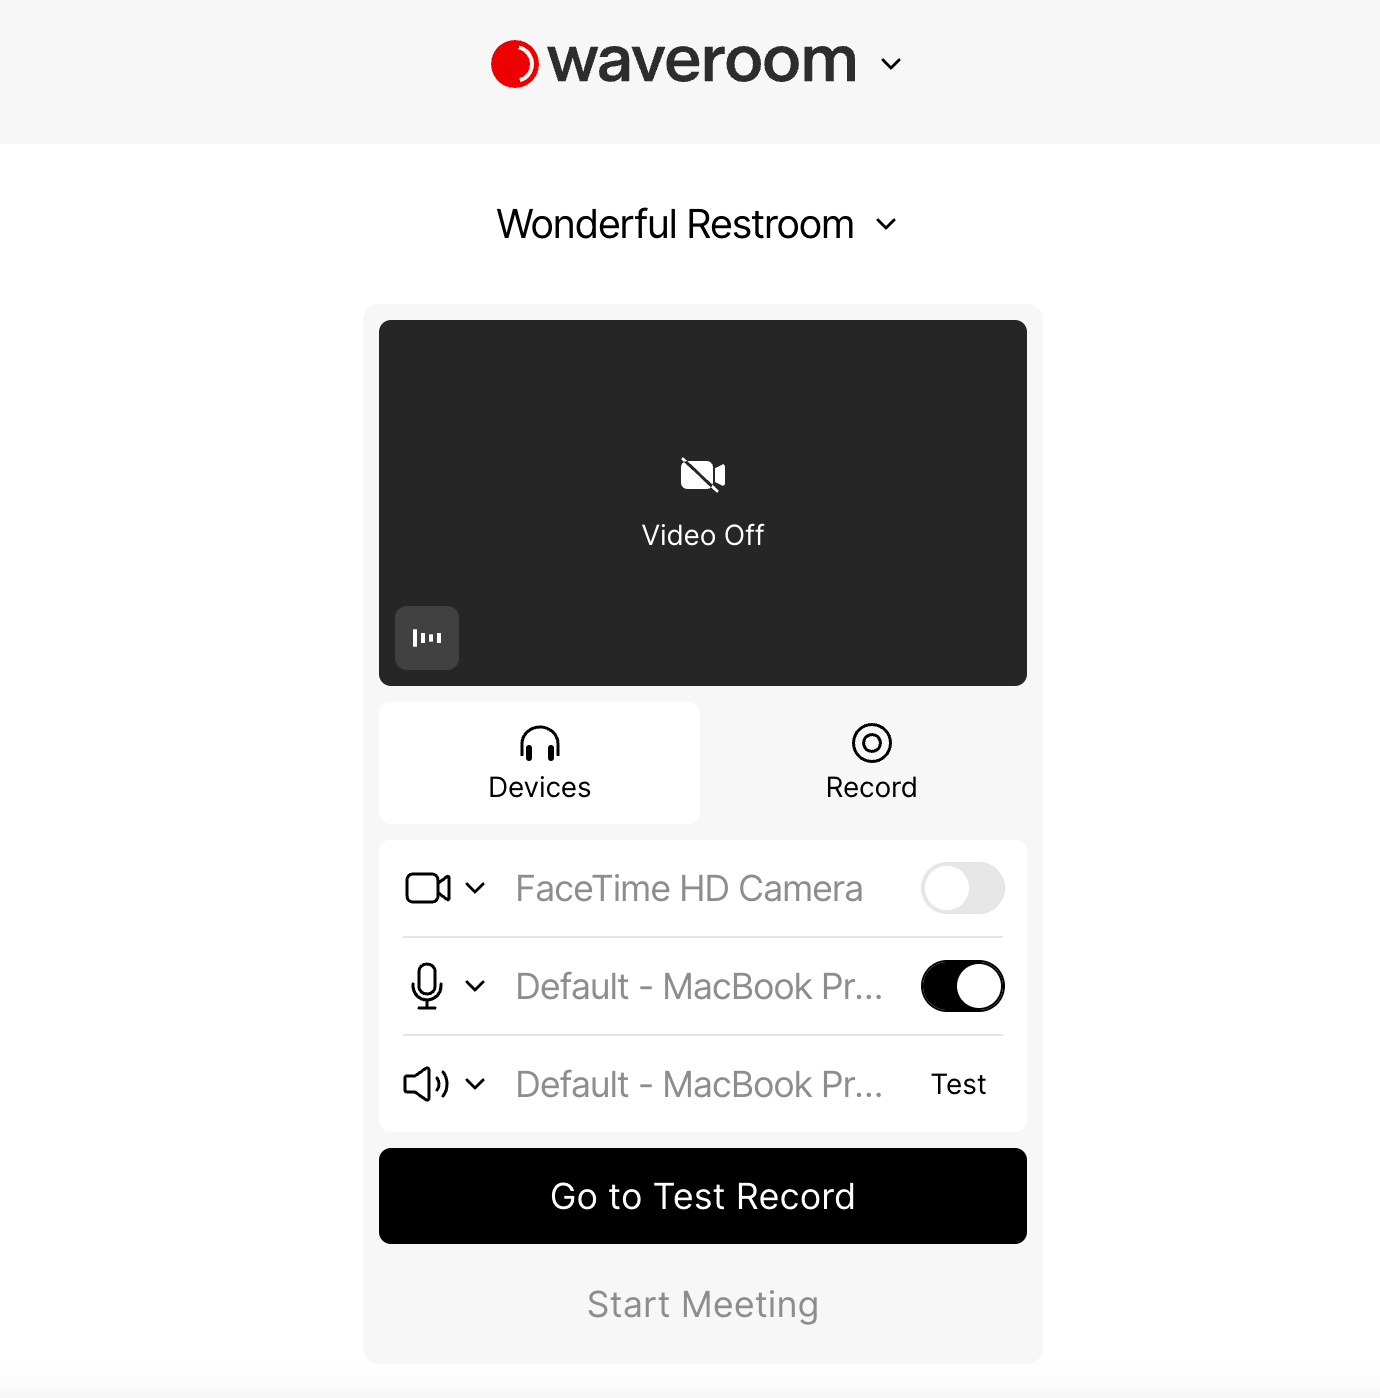
3. Set your Video, Audio, and Record preferences under the video preview in the Devices tab.
4. Click the Go to Test Record button to see how you're going to look and sound, or head over straight to Start Meeting to start recording.
5. Once you've finished the recording, Click Stop Recording.
6. Wait a few seconds while the meeting recording is being saved and press the cross button in the left corner to leave the room.
You will get back to the room that stores all the recordings you've just made, whether audio-only or video. Here, you can play and download the locally recorded video and audio files of each person who participated in the meeting.
If you've recorded a podcast in a noisy environment and some ambient sound has seeped into the recording, follow the remaining steps to cancel it out.
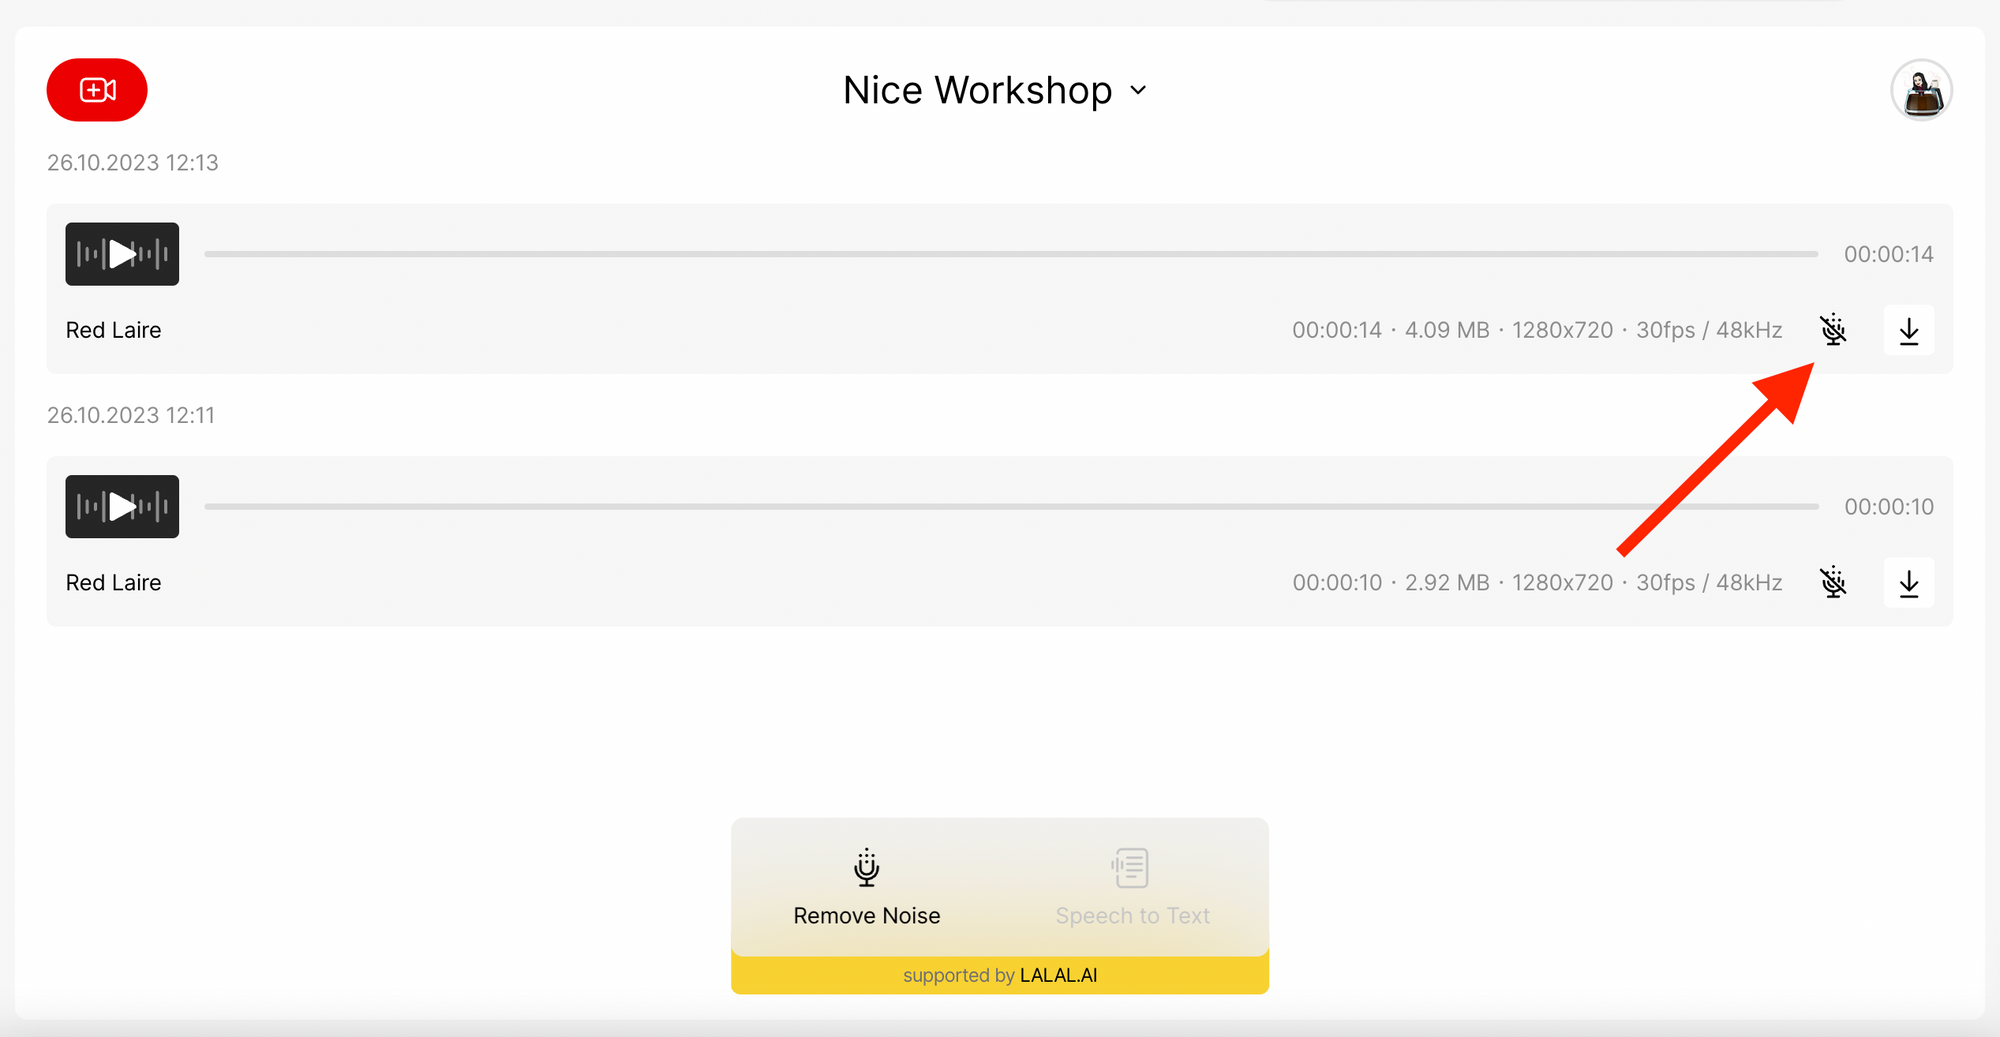
7. Press the Remove Noise button at the bottom of your screen to get rid of noise from all the recordings in the room.
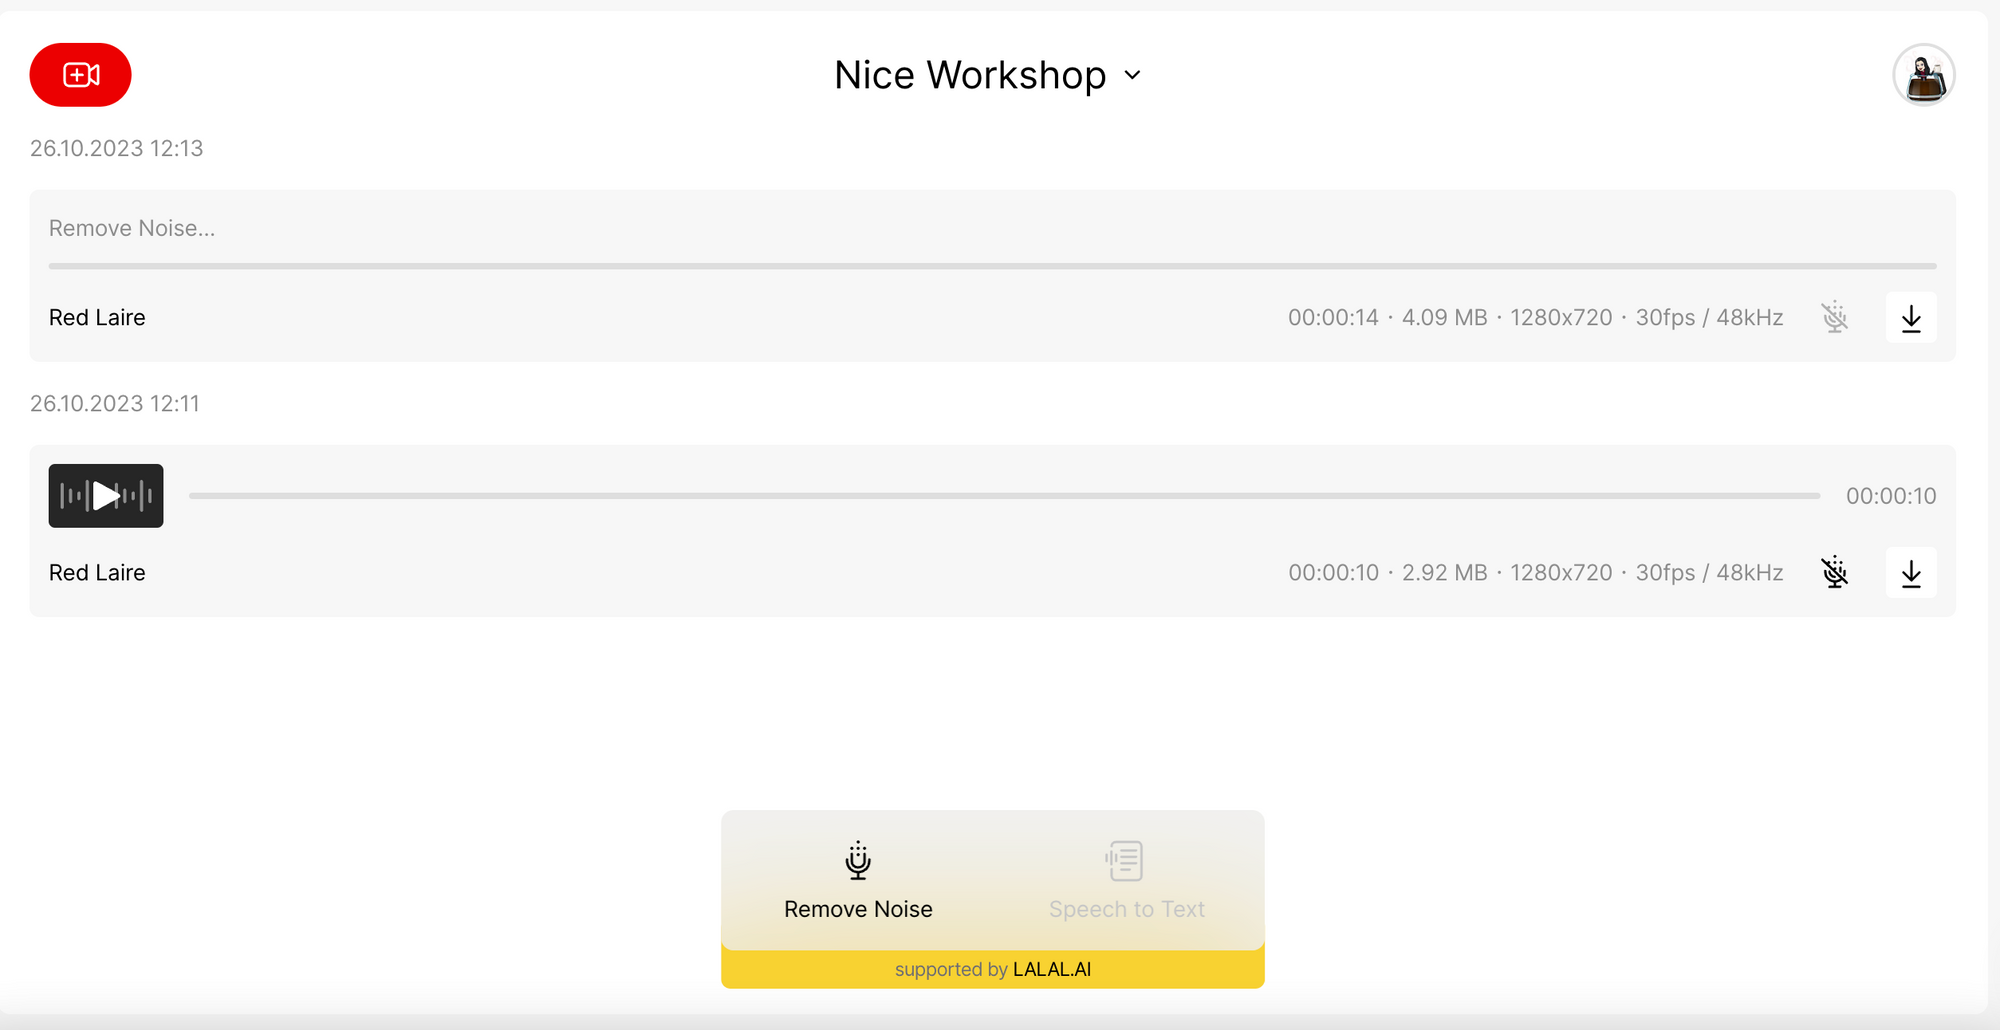
The noise removal feature can be applied to both audio and video tracks.

All the tracks that have been post-processed are labelled with a noise removal icon.
8. Export tracks as you normally would by pressing the Export Clips button (downward arrow icon).
Now your recording sounds just as crisp as it should and even better!
🔴 Give Waveroom Noise Removal a try!
You can test the free noise cancelling functionality made possible thanks to our friends from LALAL.AI now.
If you have any questions, issues, or ideas, we're open to your enquiries on our Twitter, Instagram, Facebook, and Reddit.
Happy recording!