How to Record High-Quality Podcasts Remotely
Host podcasts with multiple guests from different locations. Record long-distance interviews in studio quality from home.


Remote interviews have always been a fixture in podcasting. Well-chosen guests can bring refreshing perspectives, new topics and unique stories, all of which make podcasts more exciting for listeners and viewers.
The only downside is that sooner or later the number of great guests from your area gets sparse and the need to branch out becomes inevitable. Flying people out from other cities or even countries is not cheap especially if it’s done on a regular basis.
Luckily, there is a way to keep booking guests without breaking the bank – record podcasts remotely from multiple locations. Each guest can do it from the comfort of their own home, without having to worry about paying for studio time and traveling just to make a podcast episode.
In this article, you will find tips on how to record your audio or video podcast in the best possible quality with minimum effort.
Before you start
In order to ensure excellent results, it’s necessary not only to choose the best remote podcast recording software but also to prepare well. Creating proper conditions and choosing the right tools impact the quality of your recording. Here's what you'll need:
1️. Microphone
Having a good microphone is an absolute must for quality sound. Even the most incredible podcast recording service won’t save you if you’re using an internal laptop or computer microphone. Listeners don’t stay for long after hearing repeated audio issues.
Mic is definitely something any podcaster should invest in. Luckily, there are tons of options on the market for any budget. If you don’t have much, go for plug-and-play USB microphones such as Blue Snowball Ice ($39.99), JLab Talk ($69.99), and Rode Podcaster ($169).
In case you can afford to splurge, go for an XLR microphone like Røde NT1-A ($299), Shure SM7B ($359) and Electro-Voice RE20 ($499). XLRs are a bit less convenient than USB mics because they require an audio interface to connect them to a computer, but XLR mics provide truly professional-sounding audio that no USB mic can match.
💡 Get a pop filter for your microphone to eliminate hard plosive sounds and keep saliva off the mic during recording.
2️. Headphones
Using headphones is important during remote recording. They prevent your microphone from picking up feedback from speakers which can hurt the quality of your recording. Plus, they give you more awareness and control over the sound of the recording, catch mistakes and issues right away, especially if you’ve got noise-canceling headphones.
The grade and quality of your headphones don’t matter as much as that of your microphone, even a pair of earbuds will do just fine. But if you want and have the means to upgrade, feel free to invest in a dedicated pair of such headphones as Audio-Technica ATH-M20x ($69), Sony MDR-7506 ($80), Beyerdynamic DT 770 Pro ($139).
3️. Video camera
It may seem like a camera is only needed for those who record video podcasts, but it’s actually beneficial for audio-only podcasts too. Video bits of your podcast can be made into Instagram Reels and YouTube Shorts to promote a new episode and the podcast as a whole on social media. These bite-sized easily sharable segments can drive your engagement and attract more listeners.
What’s more, making hosts and guests see each other may be more comfortable during recording sessions that communicating solely via audio, even if the video won’t make it into the final cut.
Overall, the camera is optional but if you decide to use it for your podcast, you can go for an external webcam like Microsoft Lifecam HD-3000 ($39.95) and Logitech HD Pro Webcam C922 ($99.99) or a handheld camcorder like Sony HDR-CX405 ($228) and Canon VIXIA HF R800 ($455.99).
4️. Quiet environment
Backround noise and echo are distracting for the listener, and can seriously affect the quality of your podcast recording. These problems are usually addressed in professional studios but if you’re going to record at home, you need to handle the issues yourself. Unless you’ve got the means to set up a home recording studio, creating a temporary recording-friendly environment is the move.
Select the room where you can close the door and switch off all noisy things such as fans or move them out to another room. Put rugs and carpets into your recording place to dampen echoes. Ask your flatmates or family members you live with to not enter the room and be as noiseless as possible – your mic can pick up noises even from other rooms if they are loud enough.
💡Get a mic reflection filter to achieve a more professional sound and studio-quality
5️. Stable connection
Last but not least, is a stable Internet connection. Patchy signal and low speed will cause issues both for your and your guests throughout the recording. What’s more, some parts of your podcast will likely have to be cut out due to lags and unsynchronized parts of dialog.
In order to prevent these problems, move your router to high, central location and keep obstructions away from it. Tilt the antennas parallel to the router and pointed towards your computer or laptop. Shut down all unused devices because they consume a part of the Internet even while sitting idle.
Podcast recording software
There is a plethora of podcast recording platforms and services to choose from, many of which offer great quality and numerous handy features. You may want to go with Zoom, the most popular online meeting and recording service, but we recommend opting out for something else.
The thing is, while Zoom is extremely easy to use, it doesn’t always support HD video quality. In addition, it doesn't have an option for recording each participant's audio and video separately from desktop. Check out our list of 10 best Zoom alternatives and get something that fits your needs better.
For the purpose of this article, we use Waveroom as an example of efficient podcast recording software. It has everything you need to record a podcast, be it audio or video, alone or with multiple guests – all without spending a fortune on podcast equipment.
Waveroom records each participant locally, meaning that the recording takes place on the computer, not over the Internet, and the connection issues don’t affect the recording quality. So, if you go with Waveroom, you can cross out the fifth point off the podcast equipment checklist above.
How To Record a Podcast Remotely
1) Click Get Started to sign up or Login to sign in to your Waveroom account. You can do it either via email or social media like Google and Facebook.
2) Click the Create Room button. The room will be your virtual podcast recording studio.
3) Enter the name of your room under ‘Ready to Start?’
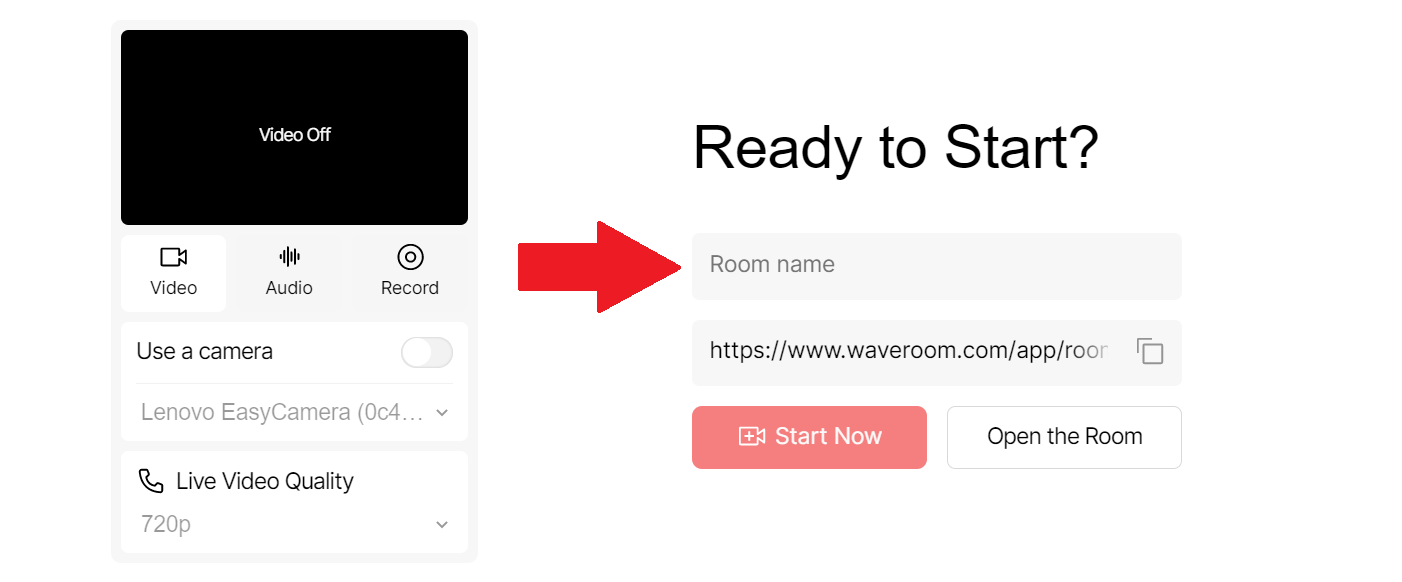
4) Connect your external microphone and camera to the computer. It will help you get the best quality unlike built-in hardware.
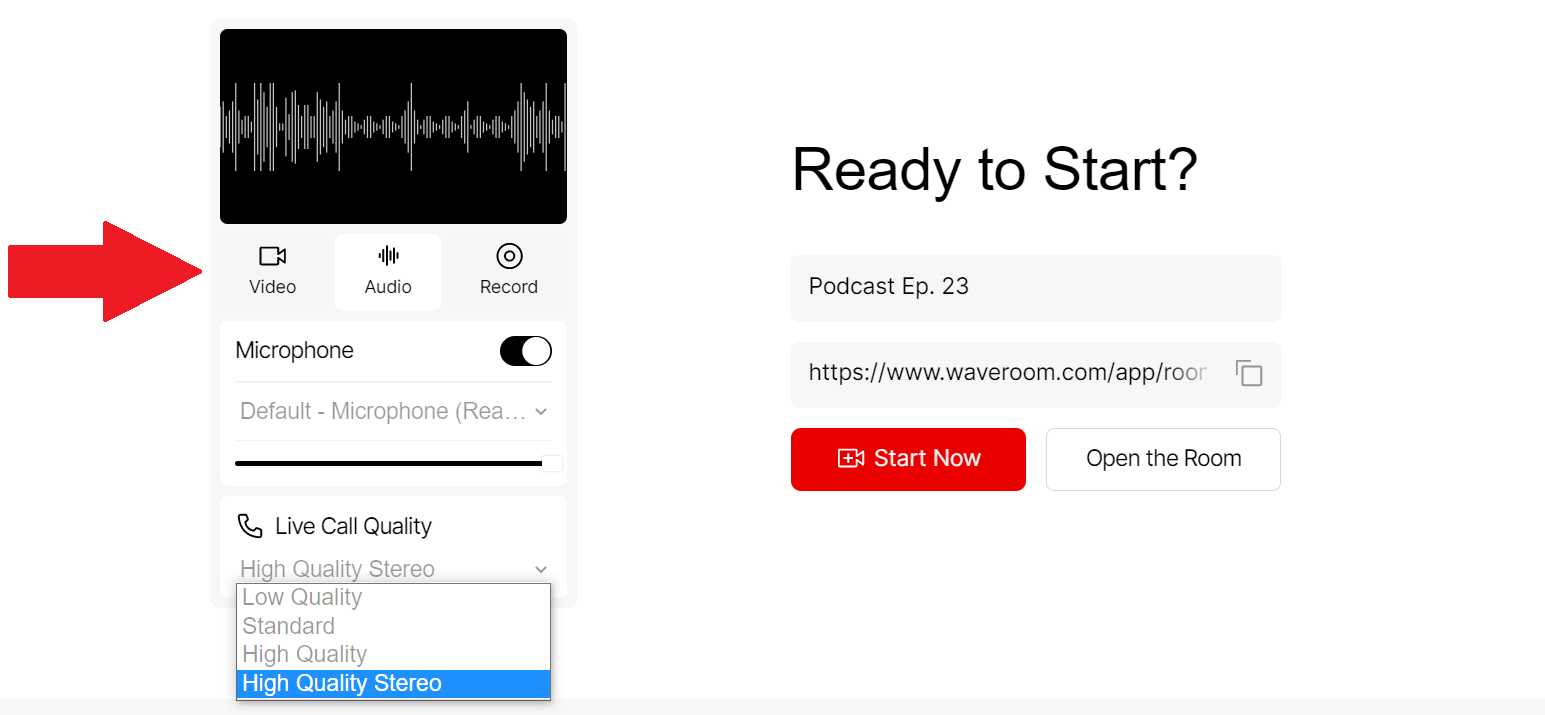
5) Pick your Video, Audio and Record preferences under the preview. Click the corresponding tabs to set the quality settings and select the external devices for recording.
6) Copy the invite link under the room name. Send it to people you want to join as your podcast speakers.
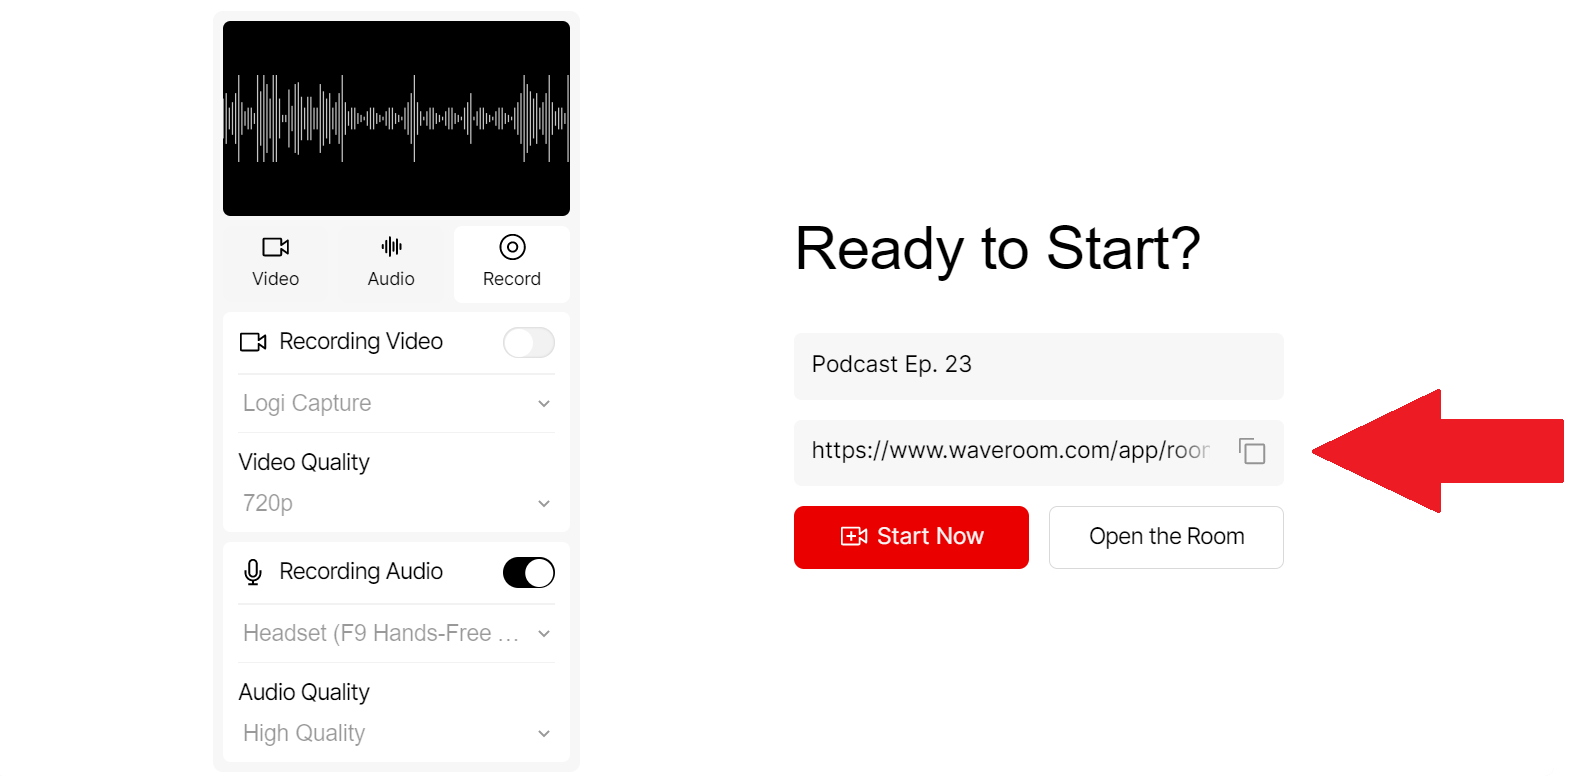
7) Click the Start Now button to open your room.
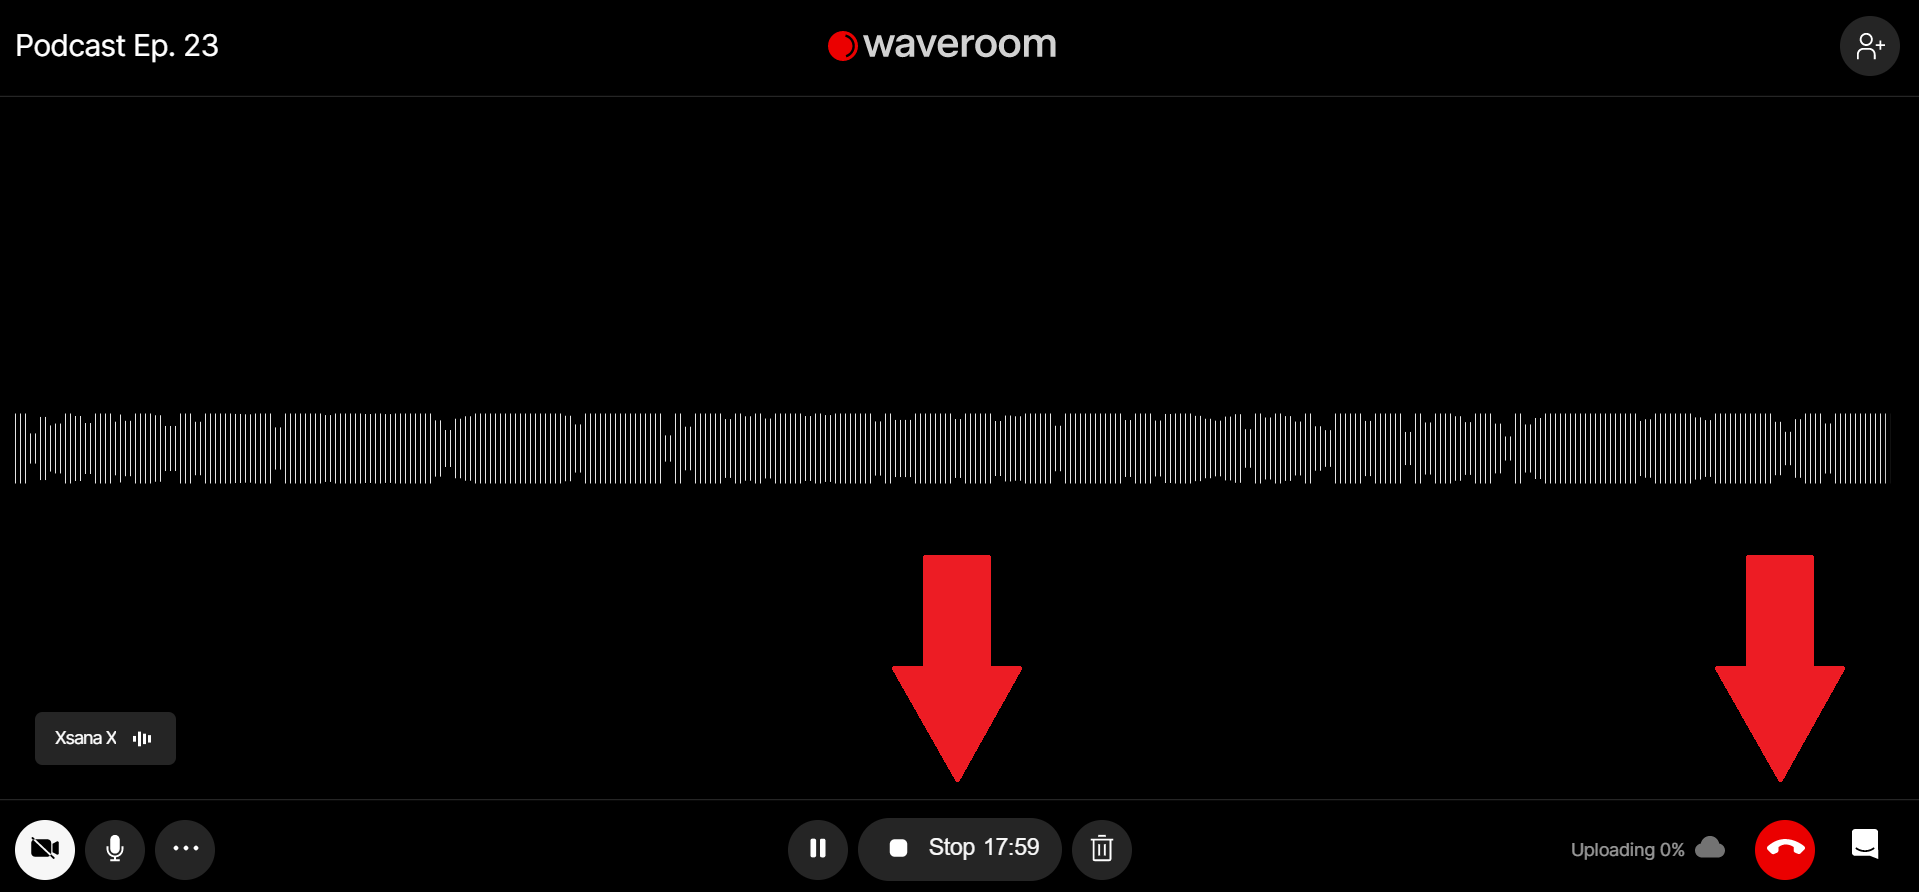
8) Click the Record button when you’re ready to start recording the podcast.
9) Once the podcast is over, click the Stop button and then the hang-up phone button to end the session and leave the recording room.
10) Wait a few seconds while the meeting recording is saving.
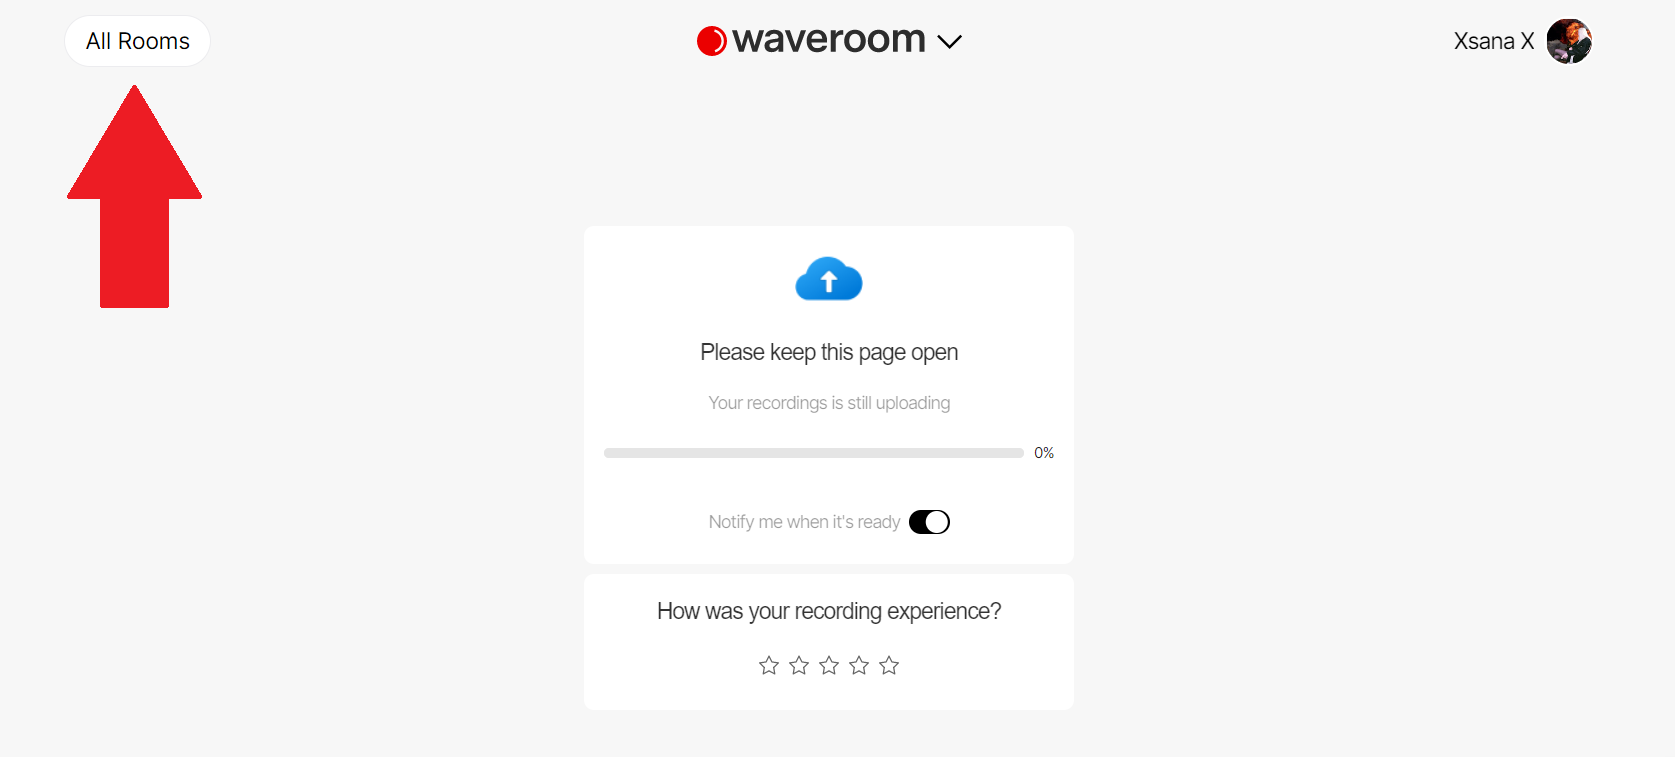
11) Click the All Rooms button at the upper left corner of the page.
12) Click the room that you’ve been in. Here you can download the locally recorded video and audio files of each podcast guest.
Now you can edit the recordings and make them into a high-quality podcast ready to be heard by the world!
Follow Waveroom on Twitter, Facebook and Reddit to get more useful tips on recording podcasts, interviews, group meetings, lessons, and corporate communications.