High-Quality Remote Podcast from Home? It’s Easy with Waveroom
Here's how to make a podcast from the comfort of your room. With Waveroom.
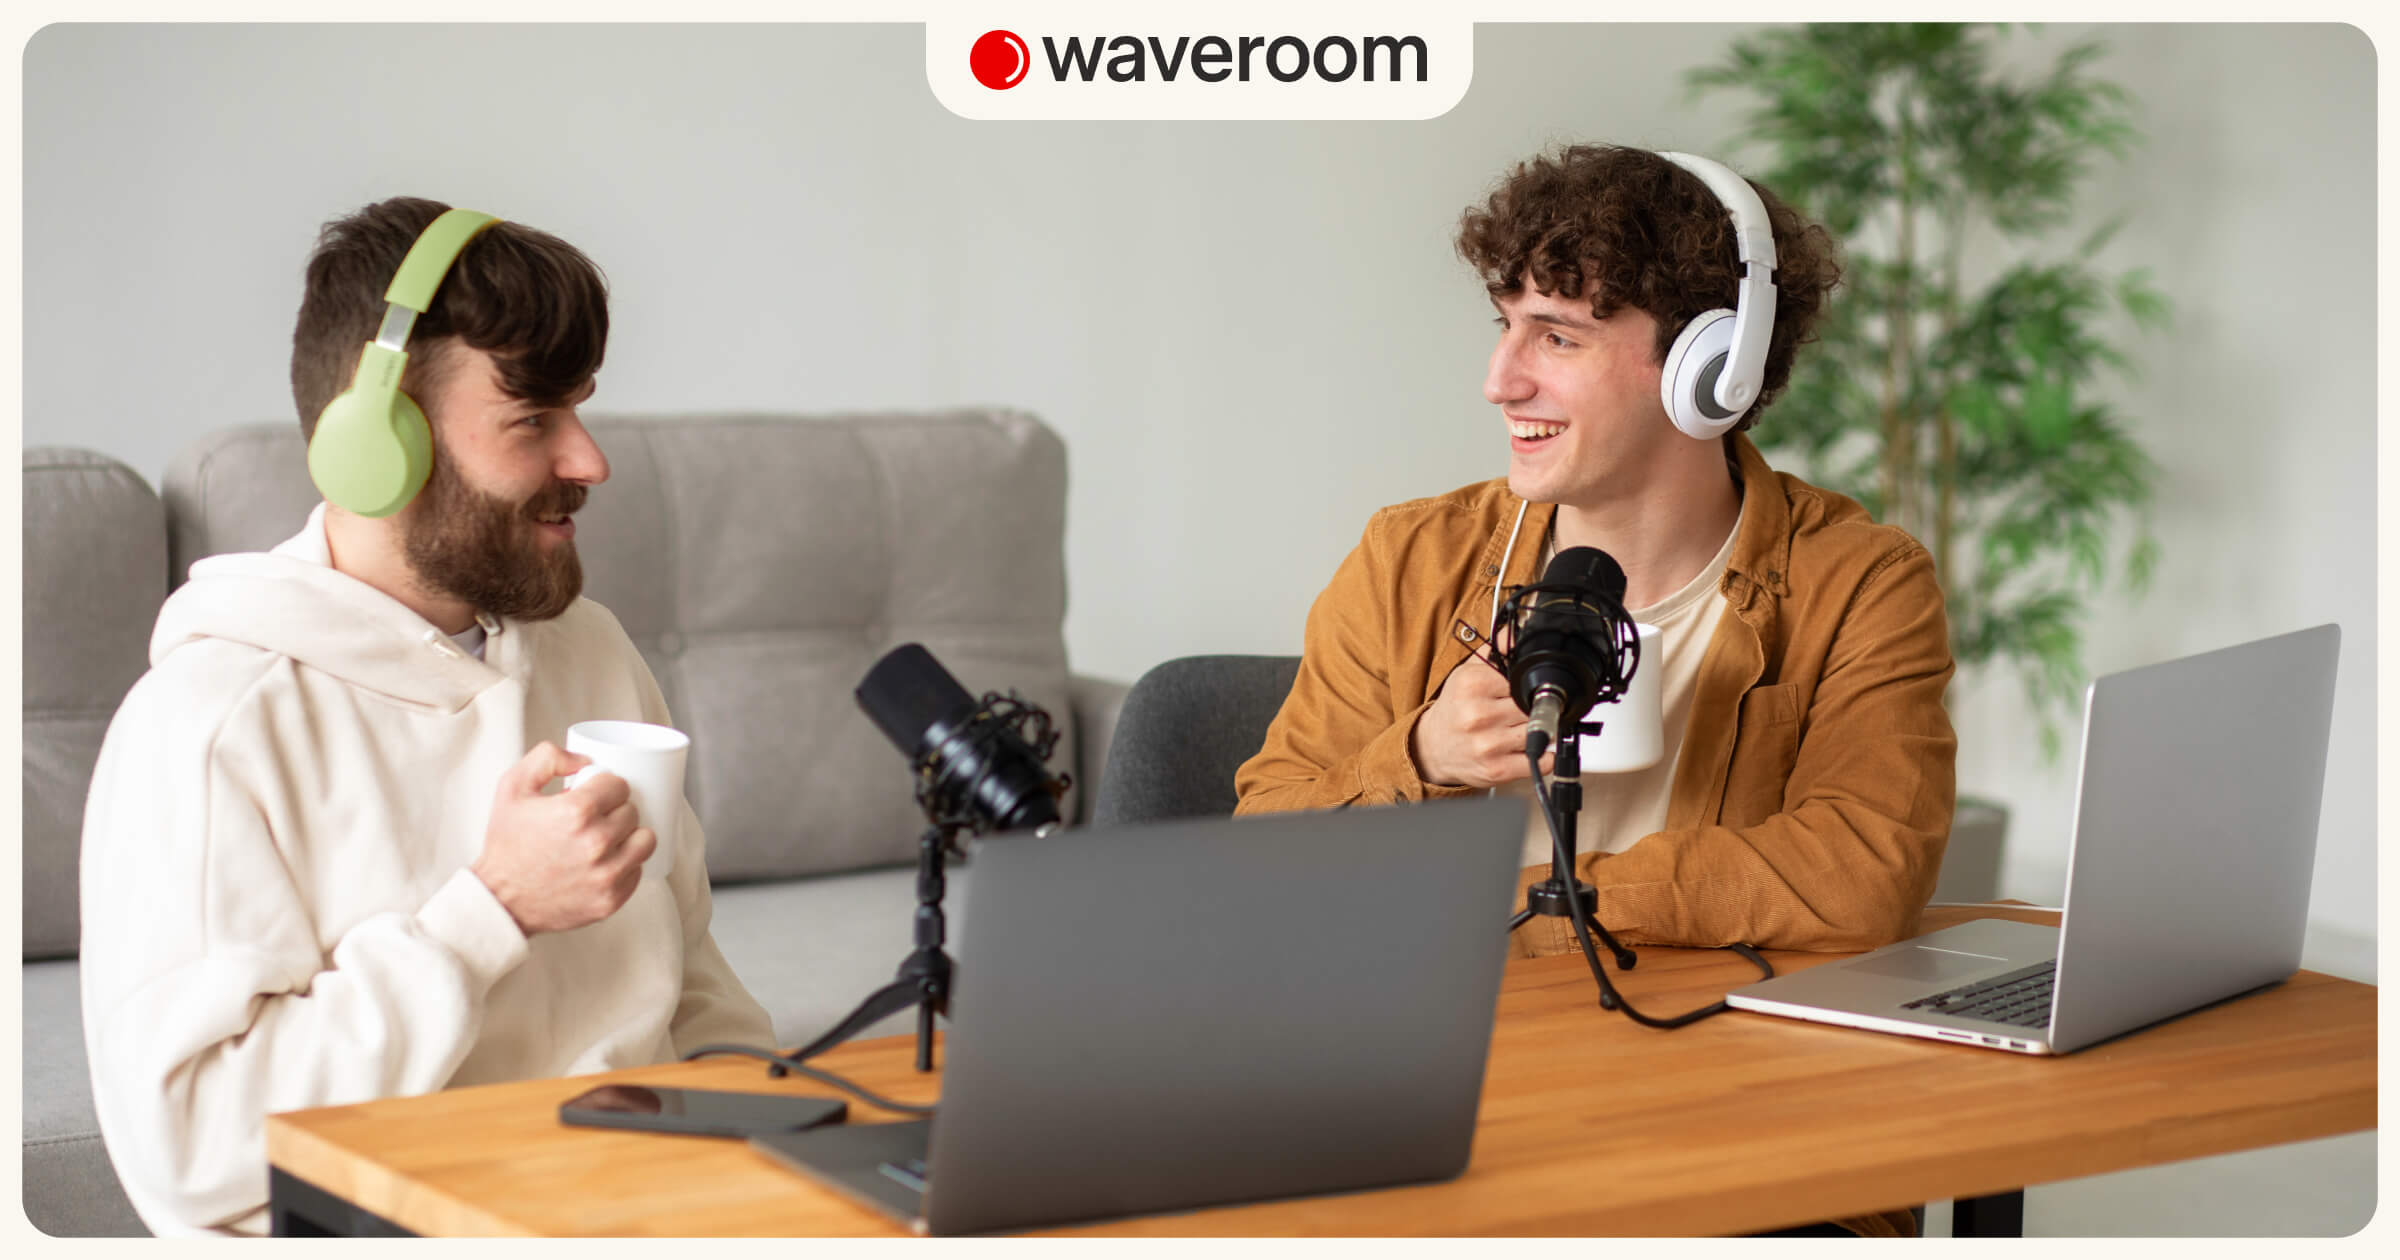
In 2024, there’s no longer need to rent a recording studio or buy the most expensive equipment to record a remote podcast. The number of podcasts has more than doubled since 2018 (this rapid growth was during the pandemic and after one), and more podcasters are opting to record from home studios.
No matter if that’s a solo flight or you’re recording a show with guests and/or co-hosts, you can set up the entire recording studio from the comfort of your home. This piece explains exactly how.
Bedroom podcast recording studio — a home setup essentials
Setting up a home podcasting studio can be relatively simple and doesn't necessarily require expensive equipment. Once you have all these elements set up, you're ready to start recording your podcast from home. It may take some trial and error, though, to find the perfect setup and settings for your specific needs, so don't be afraid to experiment and make adjustments as you go.
But here's a basic setup to get you started:
- Microphone: A good-quality microphone is a must for a bedroom studio. A popular choice for podcasting is the Audio-Technica AT2020 or the Blue Yeti. These are USB microphones, so you can plug them directly into your computer without the need for an audio interface. Another good option is the Samson Q2U, which is affordable and works in both USB and XLR form.
- Pop filter: Attach a pop filter to your microphone to reduce plosive sounds (like "p" and "b" sounds) and prevent them from being too harsh on the recording.
- Headphones: These are essential for monitoring your audio while recording. Use headphones to monitor your audio while recording to ensure everything sounds clear. Closed-back headphones are preferable to avoid sound leakage into the microphone.
- Recording software: Download and install recording software on your computer or use an online tool. Audacity is a popular free option for both Windows and Mac. GarageBand (for Mac) and Adobe Audition (paid) are also widely used. Waveroom is a good, totally free choice if you prefer online solutions.
- Quiet room: Choose a quiet room with minimal background noise for recording. And to minimise echo, use soft furnishings like curtains or rugs.
- Computer: Use a computer to record and edit your podcast. Make sure it has enough processing power to handle recording software smoothly.
- Recording space setup: Set up your microphone on a desk or stand at about mouth level. Sit comfortably in front of the microphone with good posture.
- Test recording: Before starting your podcast, do a test recording to check audio levels, clarity, and any background noise. Adjust microphone settings as needed.
- Internet connection: If you plan to have remote guests or conduct interviews over the internet, ensure you have a stable internet connection.
- Script or outline: Prepare a script or at least an outline of what you want to discuss in your podcast episode. This will help keep you on track and ensure a smooth recording process.
How to record a remote podcast from home with Waveroom
So if you need to record a show from the comfort of your room with Waveroom, set up your home studio with the equipment we featured above. Now go straight to the action.
- Log in or sign up to your Waveroom account.
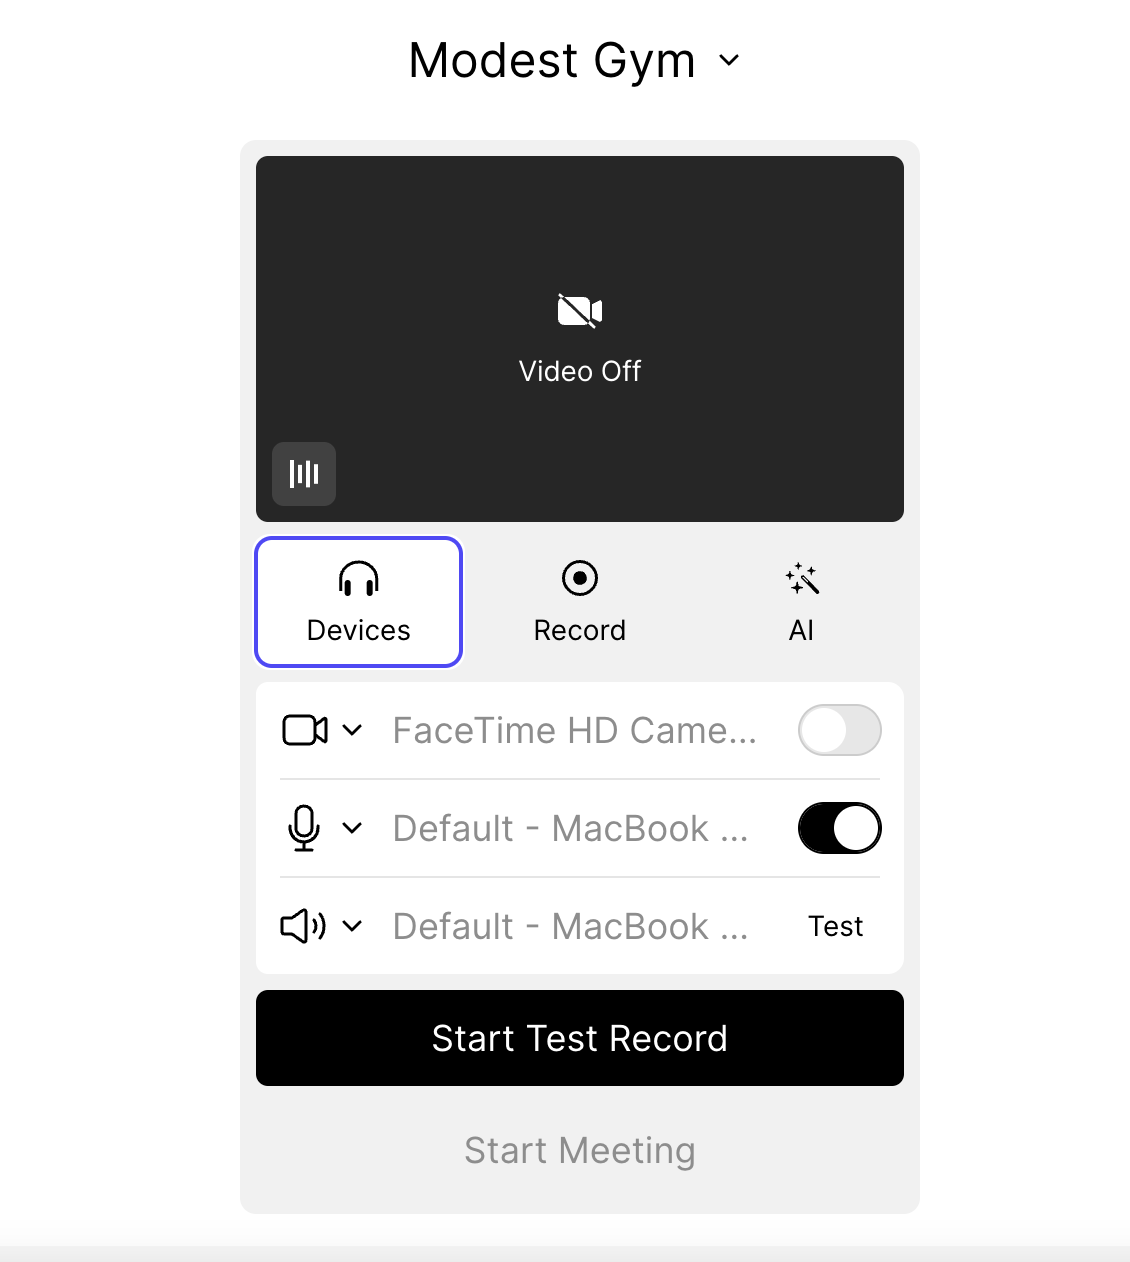
- Select your camera, microphone, and headphones in the Devices tab under the video preview.
💡Connect the best microphone and web camera you’ve got to your computer. It will help you get top-notch quality results.
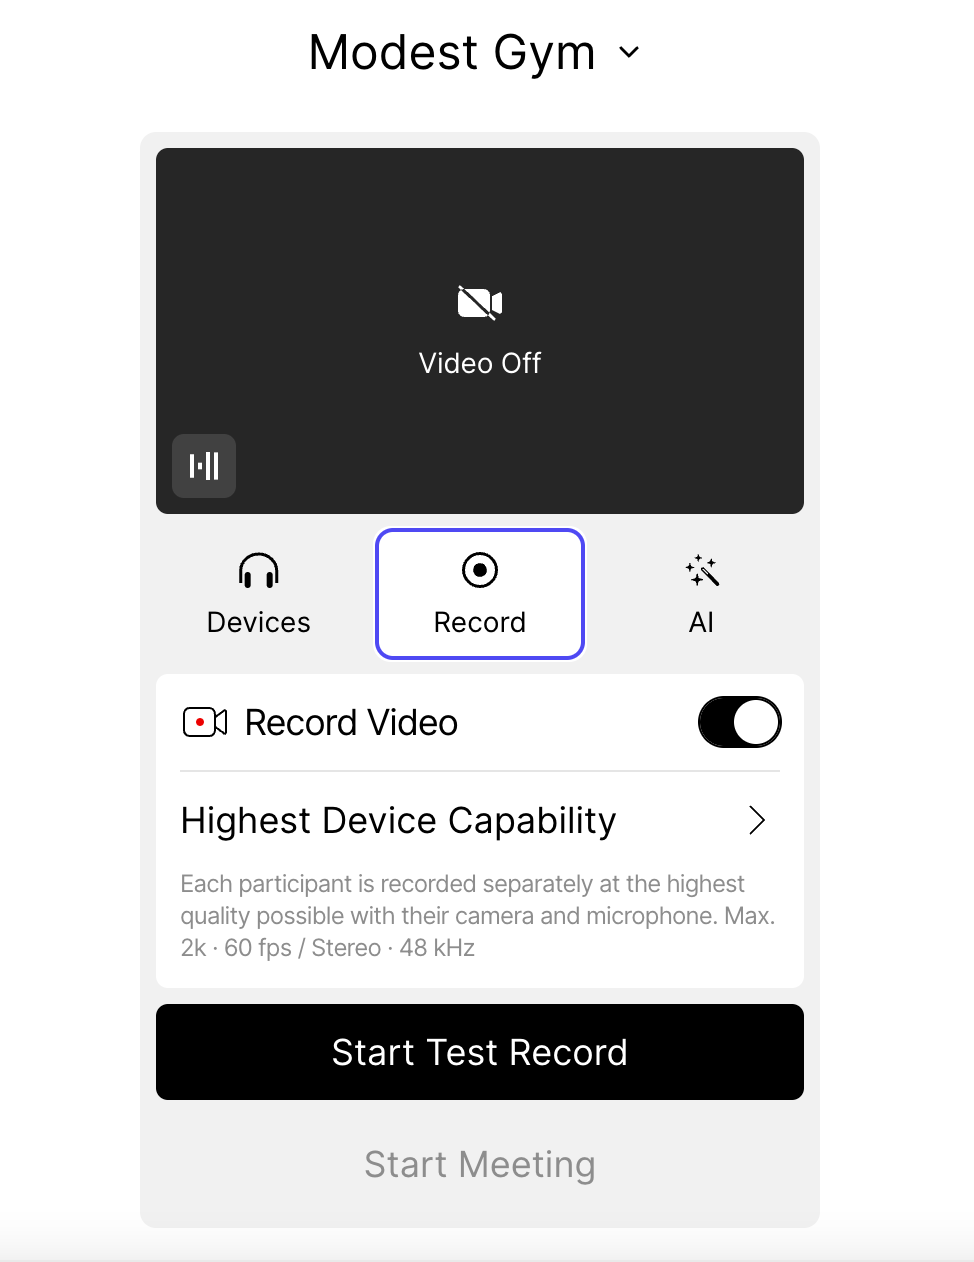
2. Select the video resolution and audio quality in the Record tab. Waveroom records uncompressed 48 kHz audio and up to 2K video.
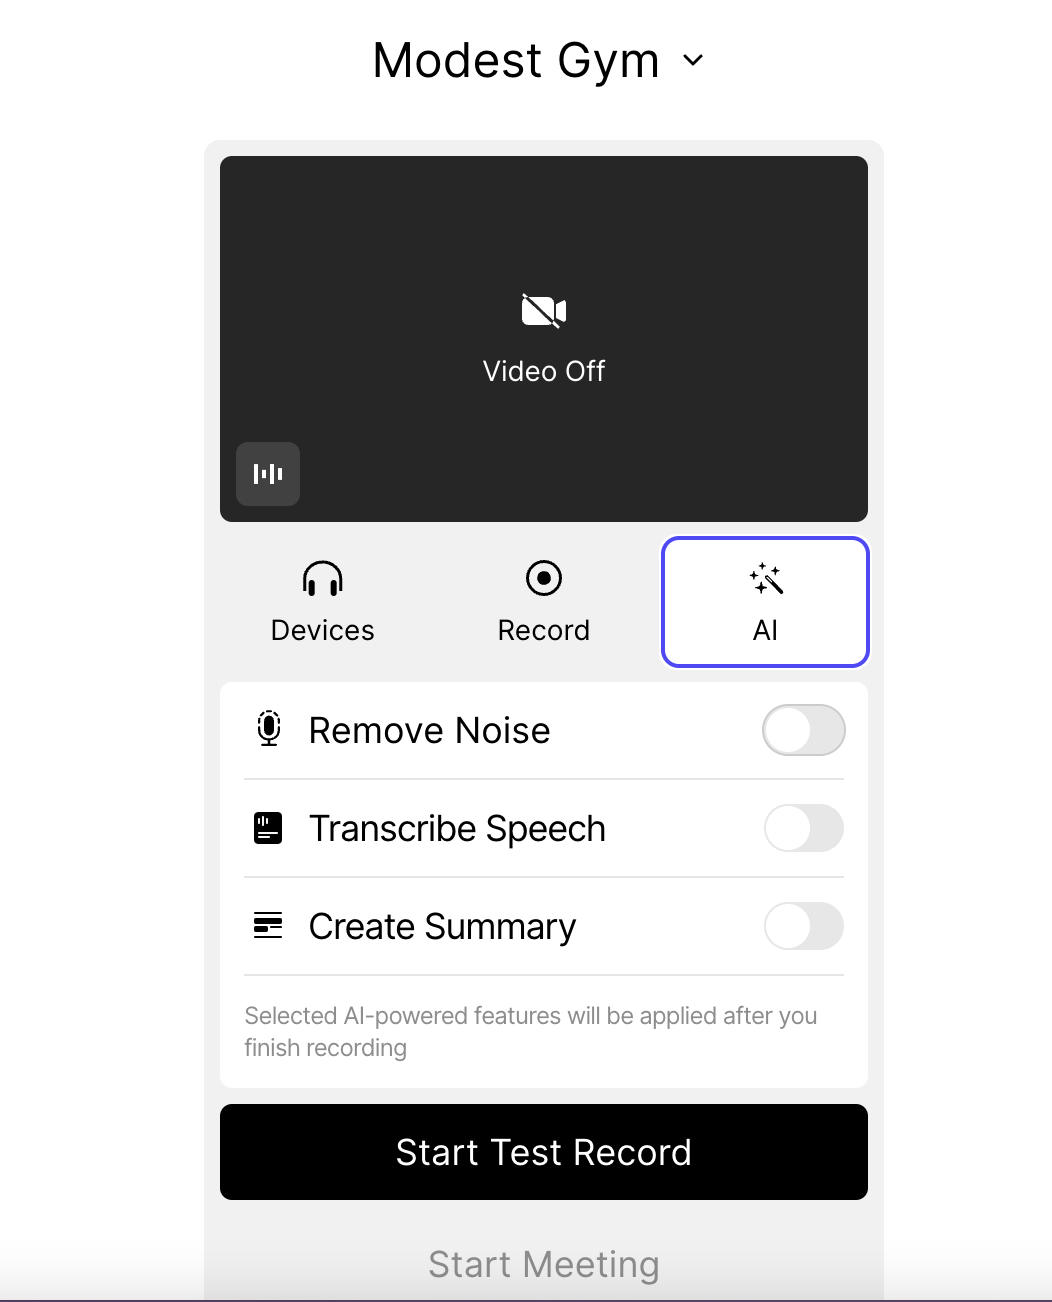
💡If you want to leverage Waveroom's AI tools, open the AI ✨ tab. Waveroom allows you to remove background noise from your show, create its transcript, and summary.
3. Click the Start Meeting button to open your recording room. If you want to test it first, opt for Start Test Record.
4. Click the Record button when you’re ready to start the podcast.
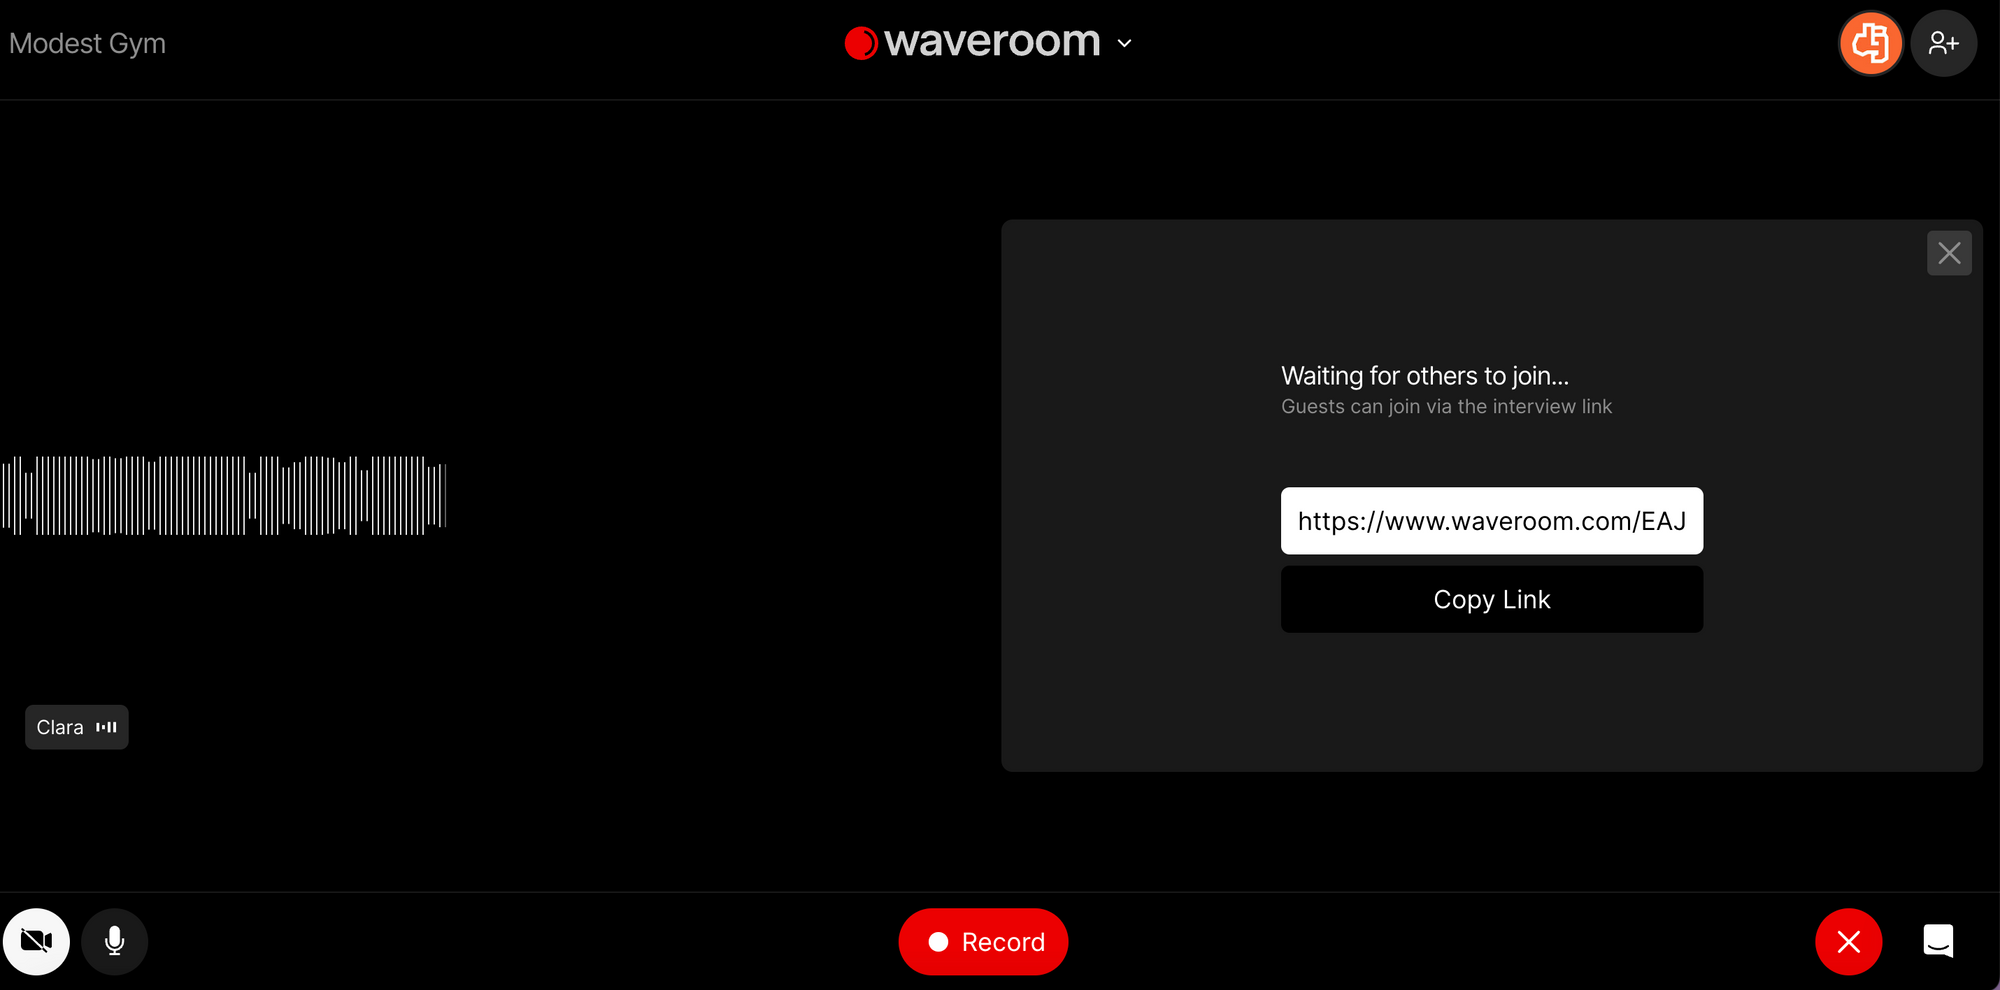
5. When you’re done, click the Stop button to end the meeting.
6. Wait a few seconds while the meeting recording is saving.
7. Click the Once you see the Upload Completed notification at the bottom right corner, click the X sign to leave the meeting.
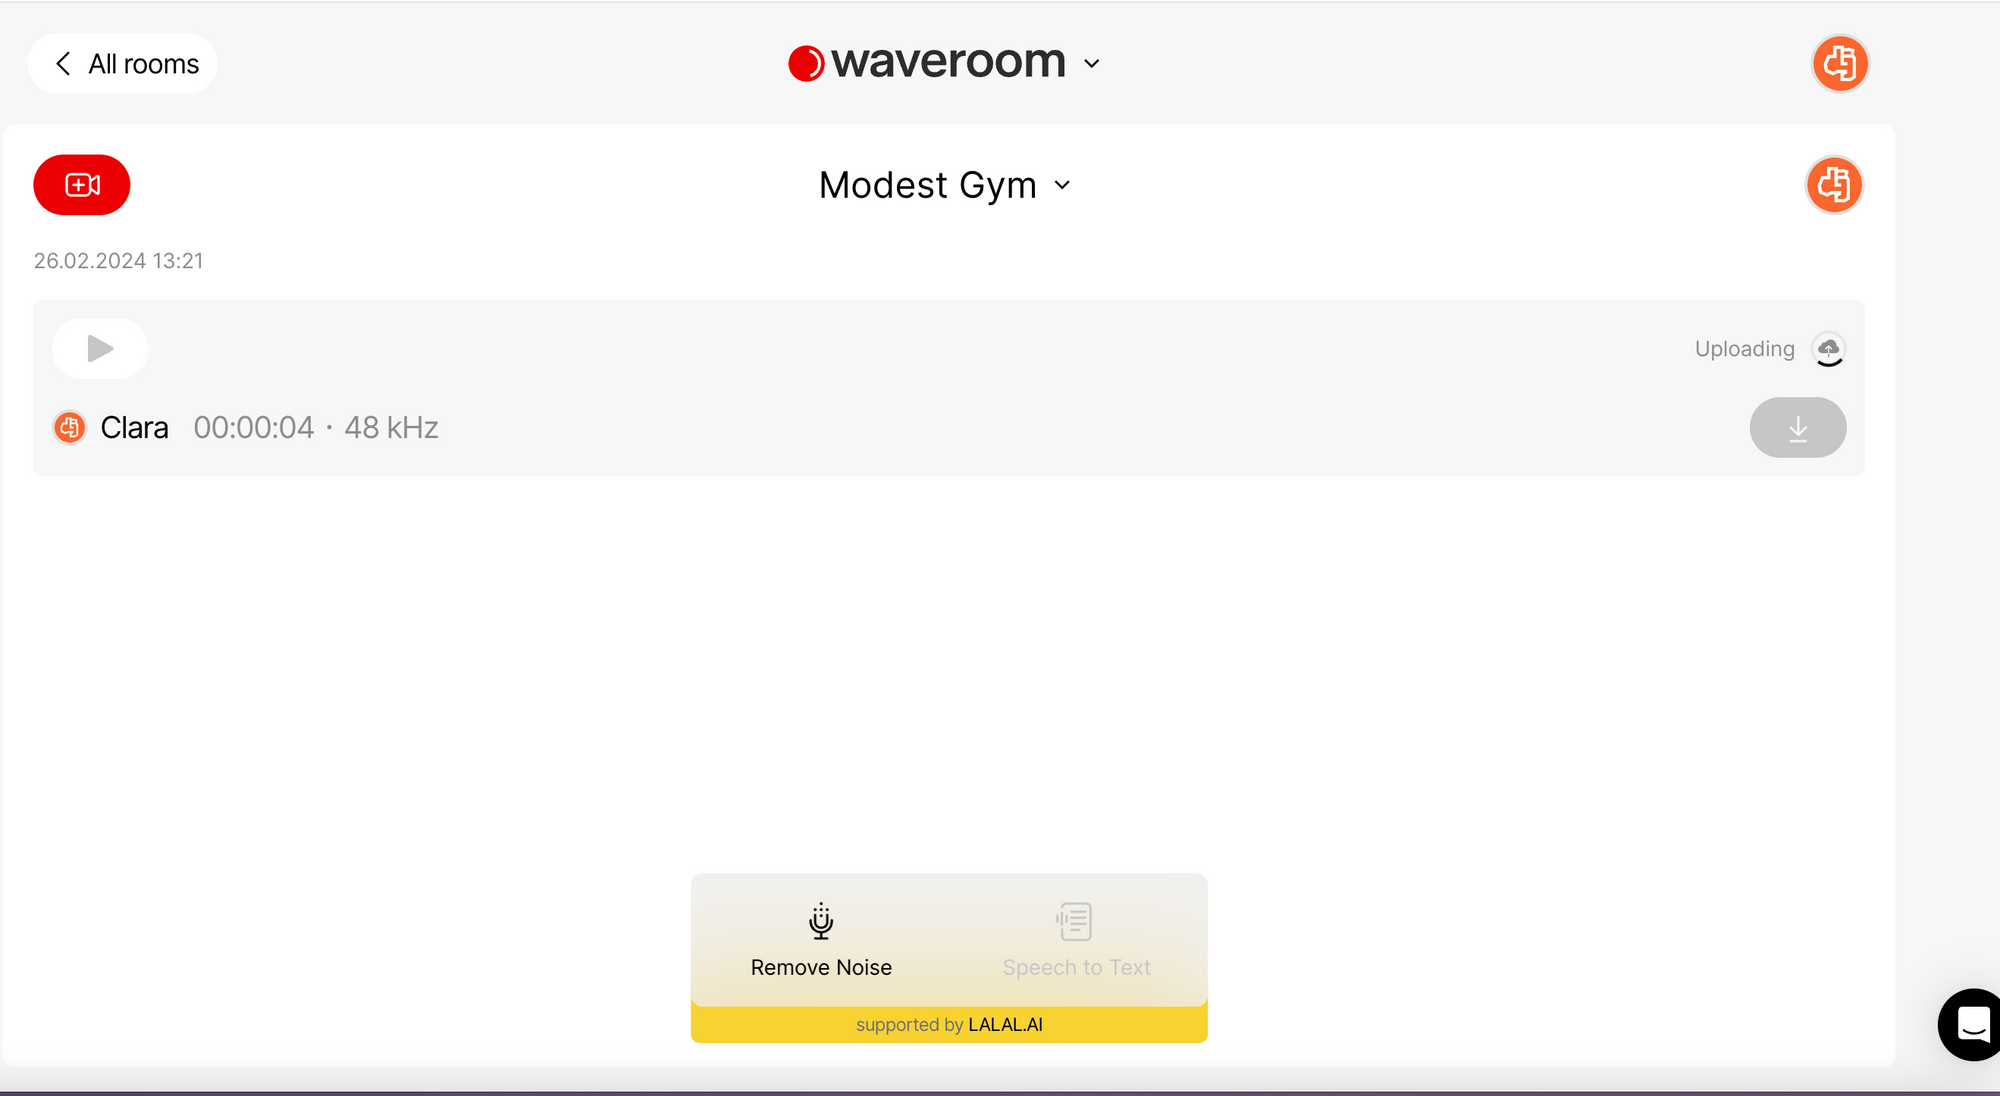
That’s it! Now you can edit the podcast if needed and upload it to various podcast platforms and your social media accounts.