In-Depth Interviews, Anywhere, Anytime: Double-Ender Recording for Podcasting
Learn what a double-recording is and why it's a must-have for remote interviews and podcasts.
Luckily, now it’s possible to have an interview even with a guest who lives half across the globe from you. And that is thanks to double-ender recording that allows you to capture audio and video at a studio-quality level from the comfort of your home or bedroom studio.
And by double-ender recording, we don’t mean Skype or Zoom calls. We mean capturing remote interviews with a local recording that ensures that even if your or your guest’s Internet connection drops, the quality remains flawless. Surely, neither Skype nor Zoom can provide that.
In this article, we’ll explain what a double-ender recording is and how to ensure your interview sounds and looks perfect with the help of it.
The problem with using Skype or Zoom for remote podcasts & interviews
Many independent podcast creators don't have access to high-tech studios like those at radio stations. Instead, they typically use Skype to make calls to guests around the world. However, Skype is known for having a somewhat unreliable connection, to say the least, which can ruin even the best interview. What's more, listeners can often tell that you're using Skype because it doesn't capture the full range of the human voice.
To ensure the most professional sound quality for your podcast audience, it's best to record your guest locally. This means getting a recording of your guest in the room they are in while they talk to you. This is what the double-ender recording means.
What is a double-ender recording?
A double-ender recording, sometimes referred to as a "double-ender" or "double-ender podcast," is a recording technique used in podcasting and other remote audio interviews. It involves having both the host and the guest record their respective audio tracks locally, using high-quality microphones and recording equipment, while they conduct their conversation over a voice call platform.
The term "double-ender" comes from the idea that there are two separate audio recordings: one from the host's location and another from the guest's location.
After the conversation is recorded, these two separate audio tracks are then synchronised and edited together in post-production to create a final remote podcast episode or interview. This method results in a much higher audio quality compared to relying solely on the audio captured from a voice call platform like Zoom, making for a more professional and polished podcast episode.
The advantages of double-ender recording
The double-ender recording method enhances the audio quality and professionalism of podcast episodes and remote interviews, making it a preferred choice for many content creators who prioritise the auditory experience of their audience. Here's what double-ender provides you with when you choose it.
High audio quality
One of the most significant benefits is the superior audio quality. Both the host and the guest record their audio locally, ensuring that it's captured with the best possible equipment and minimal background noise. This results in clear, crisp, and professional-sounding audio.
Elimination of Internet connection issues
Double-enders bypass common issues associated with internet-based voice calls, such as dropouts, audio artifacts, and variable connection quality. Each participant's audio is recorded independently, so you're not reliant on a single connection for good audio quality.
Greater control
Recording locally provides greater control over audio settings, including mic placement, levels, and processing, allowing you to achieve the desired sound quality and consistency.
Flexibility
With double-enders, participants can use their preferred recording equipment, including high-quality microphones and audio interfaces.
You have more flexibility to edit and fine-tune the audio during post-production, remove unwanted noise, adjust levels, and make the conversation sound more polished.
Double-enders allow hosts and guests to record from different locations, making it possible to feature guests from around the world without sacrificing audio quality.
Backup & redundancy
In the rare event that one audio recording fails or has issues, you have a backup from the other participant's recording, ensuring that the conversation is not lost.
Double-ender recording setup options
To create a double-ender podcast, both you and your guest can use your own recording equipment. For instance, you can set up a camera or a good smartphone to capture a high-quality video podcast and use an external handheld recorder to capture the audio.
If you opt for a compact setup with built-in high-quality microphones, the process becomes straightforward. You just hit the record button and begin your remote interview on your computer.
Double-ender recording with Waveroom
Waveroom is a free AI-powered podcast recording studio that was designed just for cases like this: record remote podcasts and interviews without quality loss.
Follow the steps below to start a recording session.
- Log in to your Waveroom account.
- Click the Create Room button.
- Enter the name of the room to easily navigate between the existing rooms in your personal dashboard.
4. Set your Video, Audio, and Record preferences under the video preview in the Devices tab.
5. Click the Go to Test Record button to see how you're going to look and sound, or head over straight to Start Meeting to start recording.
6. Once you've finished the recording, Click Stop Recording.
Wait a few seconds while the meeting recording is being saved and press the cross button in the left corner to leave the room. You will get back to the room that stores all the recordings you've just made, whether audio-only or video.
7. Press the Remove Noise button at the bottom of your screen to get rid of noise from all the recordings in the room.
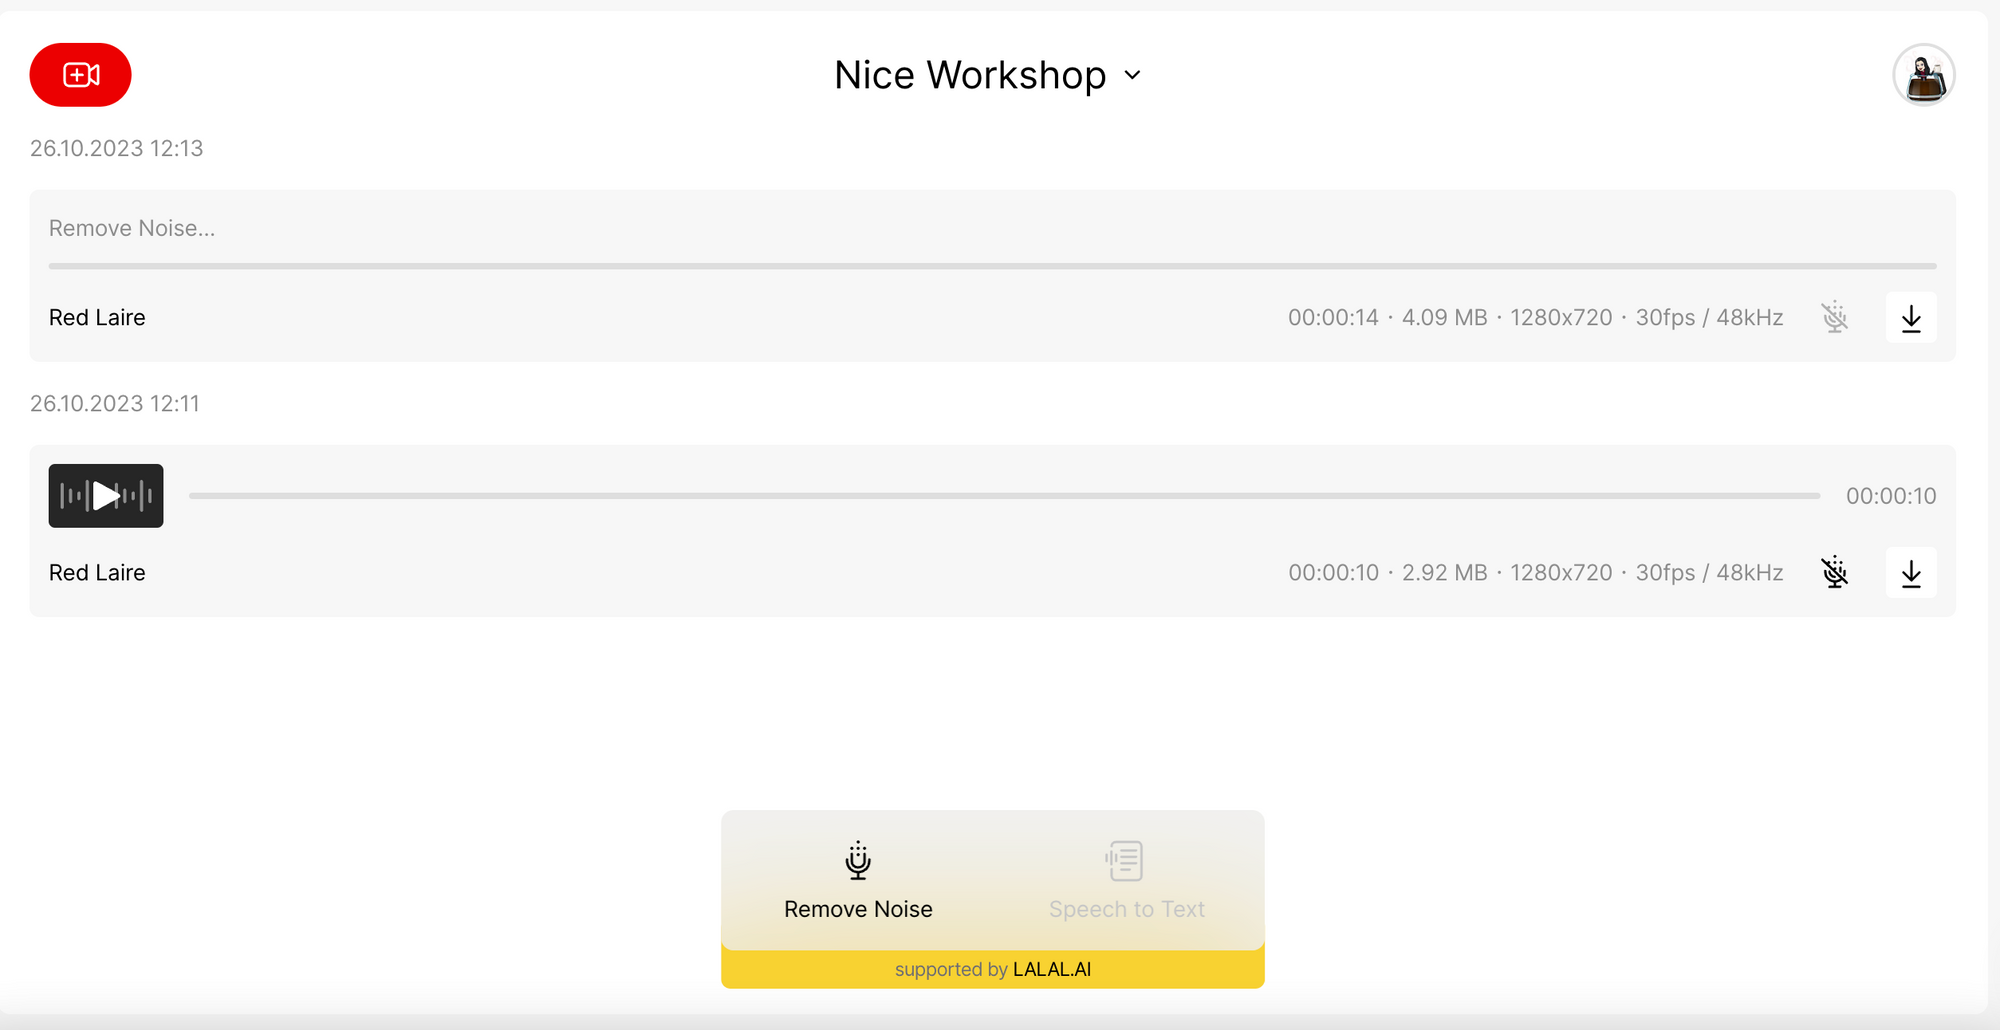
8. Export tracks by pressing the downward arrow icon.
That’s it! The recordings will be saved in the quality and resolution you’ve set before the meeting. Edit, share, watch, and listen to them any time you want.
Double-ender recording tips
Recording a double-ender podcast involves some specific techniques and best practices to ensure high-quality audio and a smooth production process. Here are some tips and best practices:
- Use high-quality microphones and headphones for the best audio quality.
- Ensure both you and your guest have recording devices, such as audio interfaces, handheld recorders, or recording software, to capture local audio.
- Use pop filters and shock mounts to reduce unwanted noises like plosives and vibrations.
- Do a test run before the actual recording to check all equipment and settings.
- Confirm that both you and your guest can hear each other clearly.
- Choose a quiet recording environment with minimal background noise.
- Use soft furnishings or acoustic treatment to reduce echoes and reflections.
- Synchronise both recordings by clapping your hands or making a loud, distinct noise at the beginning to create a reference point.
- Always have a backup recording running in case one of the main recordings fails.
- Balance audio levels to make sure both voices are equally audible.
- Mute your devices during the interview.
- When speaking, try not to move around, especially if you don’t have a mic that captures your voice from each angle.
- When gesturing, avoid tapping, slamming, and hitting surfaces.
- If you have the interview questions or script on your computer desktop, keep them close so that you don’t lose the conversation line and don’t open them with clicking and typing sounds.
Guidelines for guests
- Instruct your guest to record in a quiet space with good acoustics.
- Encourage them to use headphones to monitor audio quality during the call.
- Remind them to speak clearly and at a consistent volume.
- Ensure both you and your guest have stable internet connections for the call to avoid dropouts or interruptions.
By following these tips and best practices, you can ensure a successful double-ender recording that results in high-quality audio and a professional podcast episode.
How to edit double-ender recordings
When your call is over, you'll get separate files for each person on the call. To edit them, use your chosen editing software. To make sure the files match up, create a starting point by, for example, having everyone clap together or say "Hello" after you begin recording. Then, you can easily line up the files and start editing.
Editing double-ender recordings involves synchronising and mixing two separate audio tracks from the host and the guest to create a seamless and polished podcast episode.
Look for a reference point in both audio tracks to sync them. This could be a clapping sound or any other distinctive noise made at the beginning of the recording. Align the two audio tracks so that the reference point matches, making the audio content line up properly.
Balance the audio levels between the host and guest. Ensure that both voices are equally audible and consistent throughout the episode. Use equalization (EQ) to enhance the sound quality if needed, reducing any unwanted noise or improving voice clarity.
Remove any background noise, such as clicks, pops, or other disturbances, from both tracks. Edit out any mistakes, long pauses, or irrelevant content to keep the episode engaging.
Insert your podcast's intro and outro music or sound effects as needed. If your podcast includes music or sound effects during the conversation, insert them at the appropriate times. Ensure the music and effects are appropriately balanced with the spoken content. Export the edited episode as a single audio file in the format you typically use for your podcast (e.g., MP3, WAV).